Discover everything you need to know about bathroom tiles, from types of tile materials and finishes, expert cleaning tips to how to choose them - read below to master your bathroom renovation!
Book a FREE online design consultation and see all the Bathroom Tile ranges and options.
Bathroom Tiles
DIY Tiling
Tile Information
The Ultimate Guide to Bathroom Tiles
4 min read | Updated: 2024
Bathroom tiles are the key-component in any public or private bathroom and ensuite due to their blend of functionality and aesthetic appeal. They have the power to define the overall style of the space, offering a durable, water-resistant surface that can withstand frequent cleaning and frequent moisture.
You can learn more about bathroom tiles below:
There are many types of tile materials you will see at a Volare tile shop, each with their unique properties and for different purposes. Here are six tile material descriptions to help you understand what tiles are made of followed by our recommendation on which tile type you should use for your bathroom remodel.
Ceramic tiles are made of clay which are moulded into the desired shape and then baked in a kiln at extremely high temperatures. After this process they are naturally durable and extremely strong making them ideal for the family home.
Ceramic tiles come in many different shapes and sizes, are easy to install and are quite affordable compared to the tile types.
Another reason ceramic tiles are so popular is that they come in glazed and unglazed varieties, both having their distinct advantages (keep scrolling to find out). A colourful glazed ceramic tile can be used to create stunning statement pieces in a room, such as a stunning kitchen splashback.
Porcelain tiles are constructed from clay and sand then shaped and blasted in the kiln at higher temperatures than ceramic tiles. As a result they achieve a higher PEI Rating (we have an article detailing Tile Slip Ratings) meaning they are harder, denser and more suitable to be used as floor tiles
In addition to their strength, porcelain tiles are extremely popular amongst renovators and architects because they can emulate the appearance of natural materials, such as concrete, natural stone (or maybe see why you should consider wood look tiles), giving the decorator the ability to achieve stunning results while still retaining the distinct advantages of tiles.
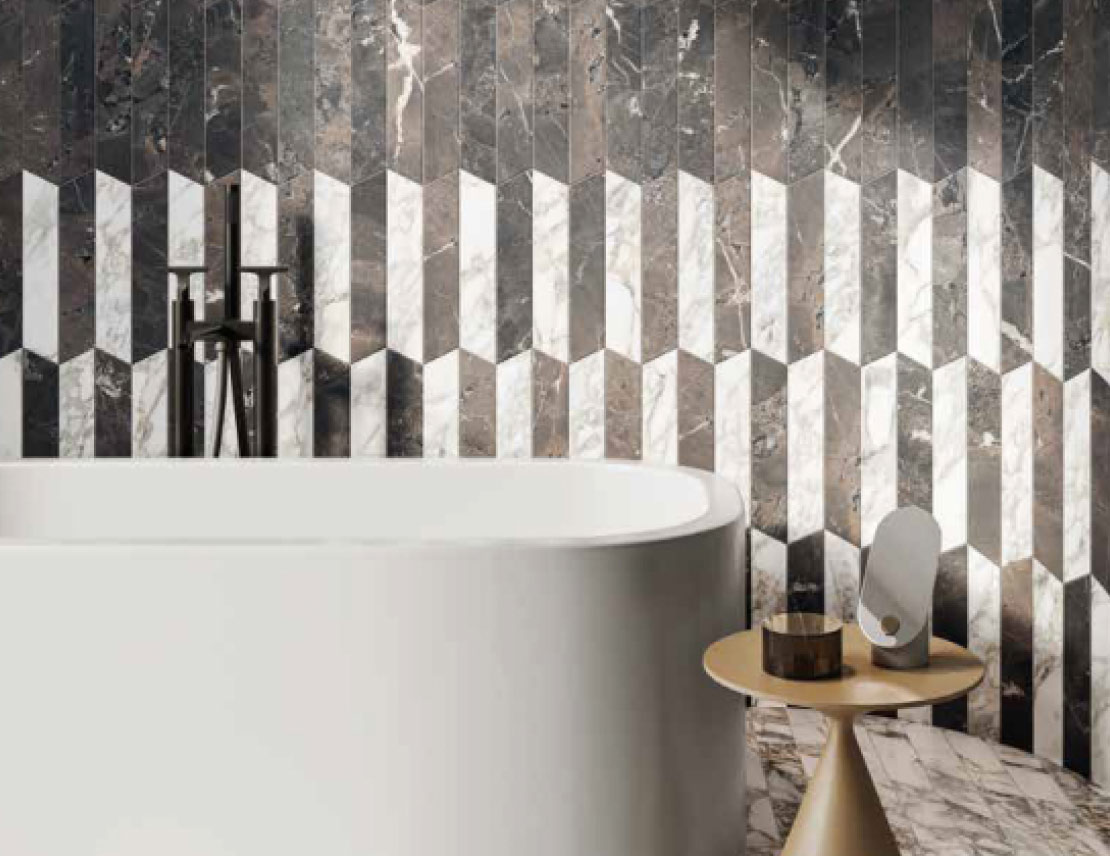
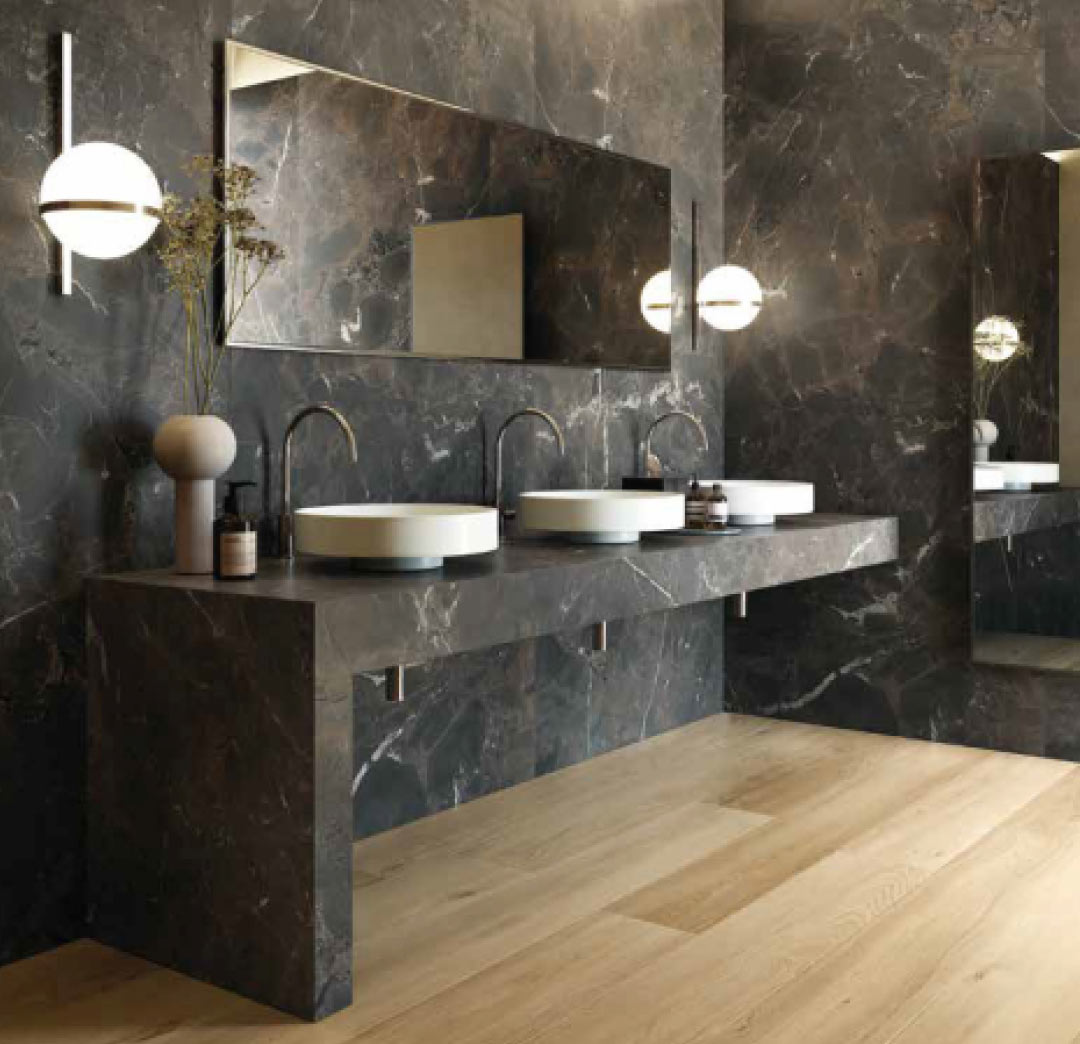
Browse the Many Shades of Marble tile range and gift your bathroom a sense of luxury.
SEE THE RANGEA glazed tile is when a standard tile, like a ceramic or porcelain tile, has a fine, glass-like layer applied to the tile material creating an excellent waterproofing quality as the glaze bonds to the surface creating a strong outer shell and attractive sheen quality.
It's this glaze which adds colour or patterns to the tile which is ideal for kitchens and wet areas as they are attractive, smooth, stain-resistant and easy to clean.
Unglazed tiles are standard tiles that are ready to use upon coming out of the kiln without the need of further processing - which may include glazing or having prints applied to them.
While glazed tiles feature a glossy finish to keep out moisture, unglazed tiles are very dense giving them similar properties with the added visual benefits of natural finishes - A popular unglazed tile is the recognisable terracotta tile.
Unglazed tiles typically have rougher surfaces to achieve higher slip test ratings making them ideal for outdoor use though they may require some sealant.
Mosaics are small pieces of tiles assorted in linear or interchanging patterns which can be used to inject eye-catching elements into an otherwise plain wall, or, to create stunning features in your house, kitchen splashback or bathroom.
Mosaic tiles generally come in all sorts of tile materials including ceramic, porcelain, glazed and unglazed varieties.
Volare Tiles + Flooring supplied mosaic tiles in mesh sheets which can be laid easier and quicker than a single piece at a time.
As mentioned above, unglazed porcelain tiles are ready to be used out of the kiln with no further processing - but they can be polished!
Polished porcelain tiles have a top surface polish to create a reflective and highly glossy appearance which are typically suited for indoor floors and walls though generally not recommended for wet areas, such as bathrooms or laundries.
A benefit of polished porcelain tiles are they look great, easy to clean and look super slick when used on the floor.
It is recommended that you choose a porcelain tile or ceramic tile for your bathroom remodel as they will deliver the same benefits of durability, water resistance, low maintenance, slip resistance (see the below section on tile finishes!) and a large variety of design and colour options.
Mosaic tiles are an eye-catching choice for decorating a bathroom as they can be arranged into intricate patterns or designs, often on small sheets for easier installation.
Accents and Borders: Mosaic tiles are often used as accent pieces or borders to highlight certain areas. For example, a strip of mosaic tiles can serve as a decorative border around the shower or vanity area.
Feature Walls: Mosaic tiles can be used to create a focal point, such as a feature wall behind the bathtub or inside the shower, transforming the area into an artistic centrepiece.
Check out all the shapes, sizes and type of mosaic tiles available at Volare Tiles + Flooring.
Ceramic bathroom tiles with new finishes, ushering in a new era of texture.
SEE THE RANGETile finishes refer to the surface texture and appearance of tiles, which can vary in terms of sheen, smoothness, and tactile feel.
The finish of a tile is an important consideration for both aesthetic and functional reasons, as it affects the tile's appearance, slip resistance, maintenance, and suitability for different areas in a bathroom or any space.
Ideal for walls, floors and splashback features, gloss finished tiles showcase a shiny surface ideal for brightening up spaces. They are easy to clean and highly water and stain resistant making them great for inside. As gloss tiles can get slippery we suggest not using them on your bathroom floor.
Matt finishes absorb light rather than reflect it, so unlike the gloss finish, your matt tiles will not have a sheen quality thus creating a rustic and traditional look. Matt finished tiles are very popular throughout the house, living areas, hallways and entryways as they have a high slip rating.
Grit finished tiles feature a significant slip resistance as they are highly granular, like sandpaper, making them the ideal choice for outdoor areas, not so much for your bathroom though.
A lappato finish fits nicely between a matt and polished tile as they are polished for a shorter time which gives them a softer finish. Lappato tiles can often be referred to as semi-polished. Instead of the full reflection a polished tile provides, the lappato will deliver an enjoyable reflection.
Tile finishes are important because they impact both the functionality and visual appeal of the bathroom. The right finish will enhance the overall design, ensure safety, ease maintenance, and create the desired atmosphere in the space.
One of the best traits of a bathroom tile is how easy it is to clean. Thanks to their natural durability they probably won't get to the point beyond needing a clean more serious than the simple methods below.
Materials: Mild dish soap, warm water, soft sponge or microfiber cleaning cloth.
Process: Mix a few drops of dish soap with warm water and use a soft cloth or sponge to clean the tiles. This helps remove grime, soap scum and everyday dirt without damaging the tile surface.
Materials: White vinegar, water, spray bottle, sponge or soft brush for tough areas.
Process: Mix equal parts white vinegar and water in a spray bottle. Spray the solution onto the tiles, let it sit for 5-10 minutes, then scrub with a soft brush or sponge.
Vinegar is great for dissolving soap scum, mould and mineral deposits but should not be used on natural stone tiles (like marble or limestone) as it can damage them. But it's a great natural tile cleaner for porcelain tiles (which you bathroom tiles probably are) and mould between grout.
Materials: Baking soda, water, soft toothbrush.
Process: Make a paste of baking soda and water. Apply it to the grout lines and scrub gently with a soft toothbrush. Baking soda's abrasive nature helps lift stains without scratching the tiles.
Materials: Steam cleaner.
Process: Steam cleaners are completely safe for bathroom tiles. They are effective for a chemical-free clean, especially for stubborn dirt and mould in grout lines. The high heat kills bacteria and mould while loosening grime.
Materials: Mould remover, water, spray bottle.
Process: If left un-tendered then mould can be an issue in bathroom tile grout - the black stuff growing between tiles. Your bathroom tile will be able to handle off-the-shelf mould removers and a good wiping per instructions.
Materials: Store-bought tile cleaner, sponge or mop.
Process: Choose a cleaner specifically formulated for your tile type (ceramic, porcelain, natural stone). Follow the product instructions for best results.
Rinse after cleaning: Always rinse the tiles with clean water after cleaning to remove any soap or cleaner residue that might cause dullness or streaking.
Dry the surface to prevent water spots: Wipe the tiles dry with a microfiber cloth to prevent water spots or streaks.
Seal grout: To maintain cleanliness and avoid grime build-up, seal the grout once a year to keep it water- and stain-resistant.
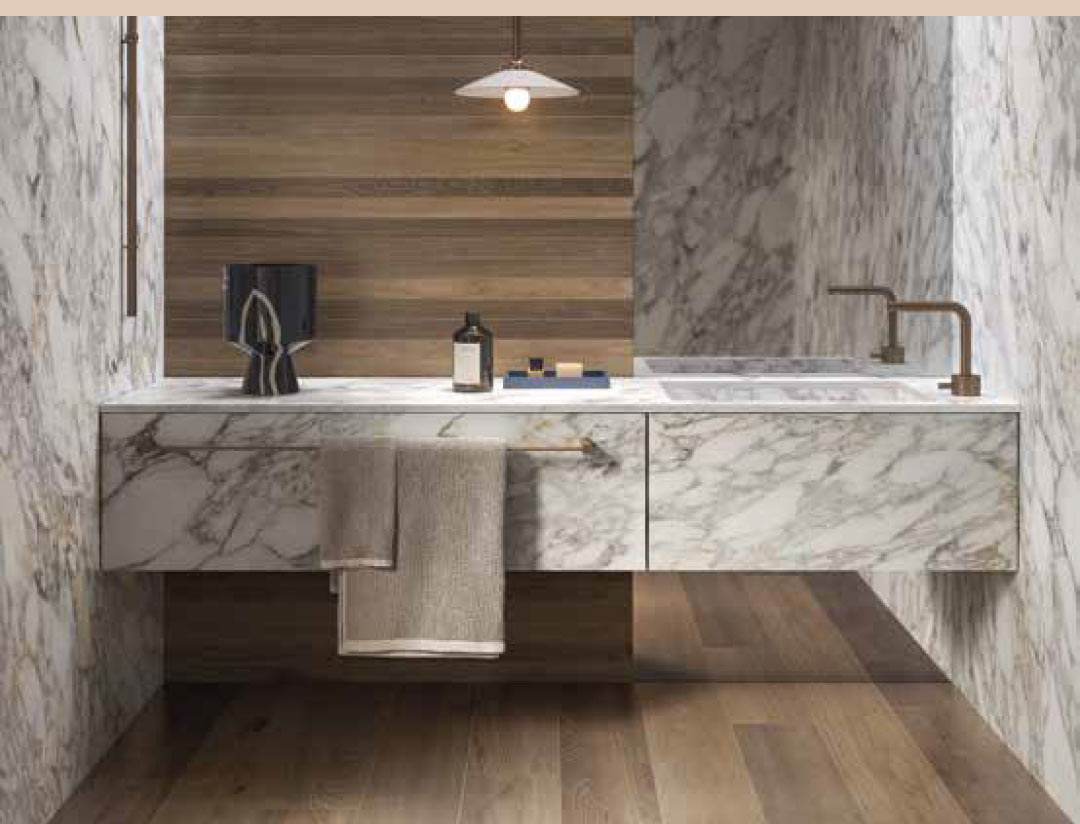
Designed to bring the purity of organic elements into your bathroom design
SEE THE RANGE
The power of a bathroom transformation lies in the interior design choices of a stunning bathroom tile
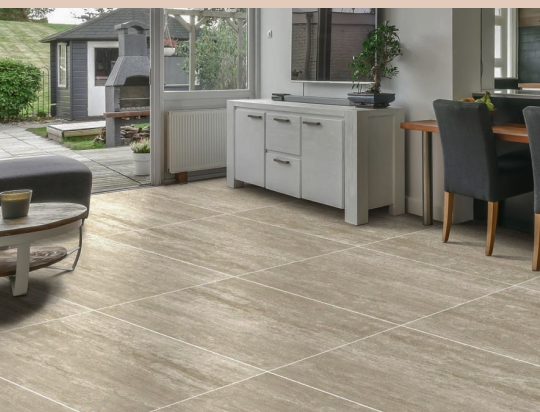
SEE THE RANGEChoosing Bathroom Tile Sizes
Choosing the right tile size for your bathroom is an important decision that affects both the appearance and functionality of the space. Bathroom tile sizes come in a variety of dimensions, from tiny mosaics to large format tiles - and all sorts in-between!
Ultimately, your decision will be made on several factors including: your bathroom size, layout, personal taste and design goal. Making the right choices will make your bathroom look like new!
Do you want something classic and clean using white tiles, a modern look with stone tiles from floor to ceiling, or an interior design that will combine looks and colours to create something that suits your personality.
Bonus: bathrooms are typically small so our bathroom renovation design experts have written an article on How Tiles Can Make Your Room Feel Bigger
Small Tiles for Detailed Patterns: Smaller tiles (like mosaics) offer more flexibility for creating intricate designs, borders, or accent walls. They allow for more creativity in laying out unique patterns, such as herringbone or geometric designs.
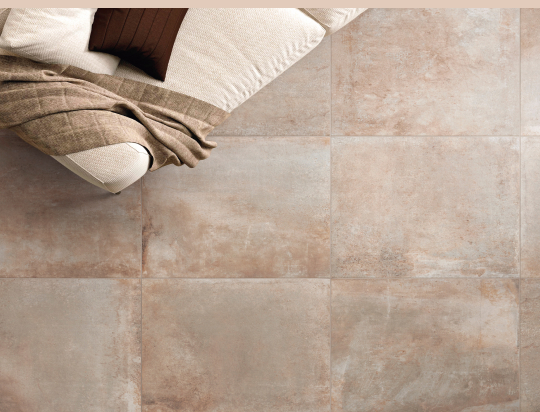
Large Tiles for Minimalist Designs: Larger tiles are ideal for creating a minimalist, modern look with fewer visual breaks. They're often laid in straight lines or staggered for a clean, streamlined appearance.
Large Format Tiles: Ideal for creating a sleek, open look on bathroom floors. The fewer grout lines make the floor easier to clean, and the larger surface area can make the bathroom feel more spacious.
Medium Format Tiles: These tiles work well for medium-sized bathrooms, offering a balance between ease of installation and aesthetic appeal. They're versatile and can be laid in various patterns, such as diagonal or checkerboard.
Large Format Tiles: Larger tiles can make walls look sleek and modern. These are often used for large, continuous walls, especially in showers, to create a sense of continuity. Large format wall tiles help minimise the visual breaks caused by grout lines.
Medium and Subway Tiles: Subway tiles are a classic choice for bathroom walls, offering a clean, timeless look. They are often arranged in running bond or herringbone patterns.
Mosaic Tiles: Often used for decorative wall features, mosaics are perfect for accent walls, backsplashes, or within niches. They add colour and texture, making them ideal for small areas that you want to highlight.
Large Format Tiles: Using large tiles in a shower creates a sleek, spa-like appearance. However, ensure they have a slip-resistant finish for shower floors.
Mosaic Tiles: Ideal for shower floors because they provide slip resistance. Mosaics can also be used on shower walls for intricate designs or as decorative bands and niches.
Subway Tiles: A popular choice for shower walls. Their size makes them easier to install than smaller mosaics while still providing a traditional, elegant look.
Ultimately it will come down to your design goals, what bathroom remodel design inspiration resonates with your tastes then finding the best bathroom tile.
Laying bathroom tiles is a process that requires careful planning, precision, and patience. Whether you're tiling the floor, walls, or shower, following the right steps will ensure a professional-looking finish that lasts. Here's a list of materials and tools you will need to lay bathroom tiles:

Fancy yourself a DIYer around the home? You can do it! Below is an 8 step-by-step guide, with bonus tips for success, to laying bathroom tiles to give you some assistance.
Why It's Important: Proper planning ensures your tiles are aligned correctly and minimises awkward cuts.
Measure the Space: Start by measuring the area where you plan to lay tiles. Calculate how many full tiles you will need and plan where the cuts will be.
Dry Lay the Tiles: Lay out the tiles on the floor or wall without adhesive to get an idea of how they will look. Ensure the pattern is symmetrical and that cut tiles are positioned in corners or less visible areas.
Establish a Starting Point: For walls, you generally want to start at the bottom and work your way up. For floors, you should start from the centre or a corner, depending on the layout. Use a chalk line or laser level to mark reference lines.
Why It's Important: Tiles need a flat, clean, and solid surface to bond correctly and prevent future issues like cracks or unevenness.
Clean the Surface: Remove any dirt, dust, or debris from the surface. If you're tiling over an old surface, ensure that it's clean and free of any grease or oils.
Level the Surface: The surface should be flat and smooth. Use a levelling compound if the floor or wall has uneven areas. For shower areas, ensure that the floor has a slight slope toward the drain to prevent water pooling.
Apply Backer Board (if necessary): For bathrooms, it's recommended to use a moisture-resistant backer board (cement board) on walls or floors that will be exposed to water, such as in showers. Secure the board to the studs or subfloor using screws and waterproof tape over the seams.
Why It's Important: The adhesive (thin-set mortar) secures the tiles to the surface. Mixing it properly ensures a strong bond.
Prepare the Adhesive: Mix the thin-set mortar according to the manufacturer's instructions. It should have a peanut butter-like consistency.
Apply Adhesive: Using a notched trowel, apply a thin layer of adhesive to the surface. Hold the trowel at a 45-degree angle to spread the mortar evenly, creating ridges for a good bond.
Work in Small Sections: Only apply adhesive to a small area (enough for a few tiles) at a time, as the mortar will begin to dry if left exposed too long.
Why It's Important: Ensuring correct tile placement and spacing is essential for a professional finish and proper grouting.
Place the Tiles: Press the tile firmly into the adhesive, giving it a slight twist to ensure good contact. Use spacers between each tile to maintain consistent gaps for grout.
Check Alignment: Continuously check your tile alignment with a level or laser to ensure that the tiles are straight. Adjust as necessary before the adhesive starts to set.
Cut Tiles as Needed: Use a tile cutter or wet saw to cut tiles to fit around edges, corners, or obstacles (e.g., pipes or outlets). For detailed cuts, use tile nippers.
Why It's Important: Allowing the adhesive to fully dry ensures the tiles are secure before grouting.
Wait the Appropriate Time: Allow the tiles to set according to the adhesive manufacturer's instructions, typically 24 to 48 hours. Avoid walking on the tiles or disturbing them during this period.
We have a guide to tile grout ready for you here
Why It's Important: Grout fills the spaces between the tiles, sealing them and providing a finished look.
Mix the Grout: Prepare the grout according to the manufacturer's instructions. Make sure it's lump-free and of a workable consistency.
Apply Grout: Using a grout float, apply the grout over the tiles, working it into the gaps between the tiles. Hold the float at a 45-degree angle and scrape off excess grout with the edge of the float.
Remove Excess Grout: After 15-20 minutes, use a damp sponge to gently wipe away excess grout from the tile surfaces. Rinse the sponge frequently to avoid smearing grout over the tiles. Be careful not to remove grout from the joints.
Why It's Important: Cleaning ensures a neat finish, and sealing helps protect the tiles and grout from moisture and stains.
Buff the Tiles: Once the grout has dried (after 24 hours), use a dry cloth to buff off any remaining grout haze from the tiles.
Seal the Grout: (optional but recommended) Apply a grout sealer to protect it from water, mould, and staining, especially in high-moisture areas like showers.
Inspect: Once everything is set, inspect your work to make sure there are no gaps or loose tiles. If any tiles are uneven, fix them before the adhesive fully sets.
Regular Cleaning: Keep the tiles clean with regular maintenance to prevent mould and mildew, especially in high-moisture areas like showers and around bathtubs.
Tile Spacers: Using tile spacers ensures uniform grout lines, which is key to a professional finish.
Choose the Right Tile Adhesive: For bathrooms, use a waterproof adhesive, especially in showers and areas prone to moisture.
Cut Tiles Carefully: Take your time when cutting tiles to avoid cracks. Measure twice, cut once.
Grout Colour: Choose grout that complements or contrasts the tile for the desired aesthetic. Dark grout is easier to maintain but can change the appearance of lighter tiles.
Laying bathroom tiles takes careful preparation, precision, and patience, but the results can transform your space into a stylish and durable bathroom design.
Indoor and outdoor design applications with natural beauty and durability.
SEE THE RANGE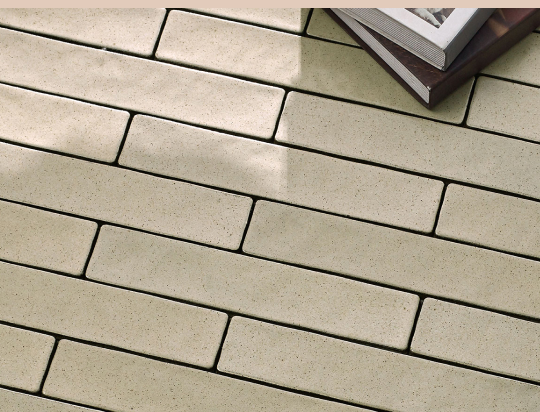
Elevate your space with a new timeless style in earthy tones and beautiful textures
SEE THE RANGEThe big question that everyone wants to know the answer to… how much will your bathroom renovation cost?
Unfortunately we can't give an exact answer as everyone's project is different. BUT we can inform you of the factors that impact the price of a bathroom remodel and give you some ballpark figures to help.
The cost of a bathroom renovation depends on several factors, ranging from the scope of the project to the quality of materials and cost of trades. Whether you're planning a simple refresh or a complete remodel, understanding these factors can help you budget effectively and avoid unexpected costs. Here's a breakdown of the key elements that influence bathroom renovation costs:
Smaller Bathrooms: Renovating a small bathroom (e.g., a powder room) typically costs less due to the smaller area to cover, less material, and fewer fixtures to replace.
Larger Bathrooms: Renovating larger bathrooms or master ensuites requires more materials, tradies and time, which increases the overall cost.
Cosmetic Upgrades: This involves updating surfaces like paint, fixtures, and lighting without major structural changes. It's more affordable and quicker than a full remodel.
Partial Bathroom Remodel: Involves replacing some features (e.g., a new vanity or shower) but leaving most of the layout and plumbing intact.
Full Bathroom Remodel: A complete overhaul that includes replacing all fixtures, retiling, upgrading plumbing or electrical systems, and possibly reconfiguring the layout. This is the most expensive option.
Bathroom Tiles: The cost of tiles varies depending on the type (ceramic, porcelain, stone, mosaic) and size. Volare have a lot of bathroom tiles to choose from plus we offer free online design consults where we can go over pricing. Average Cost: $20-$100+ per square metre.
Vanity and Cabinets: Custom-made vanities or high-end materials like stone countertops will increase costs. Pre-made vanities from hardware stores are a more budget-friendly and have great options to select from.Average Cost: $500-$5,000+ per square metre.
Shower and Bathtub: The cost depends on the type and size of the unit, whether you choose a simple shower, double shower or a custom-built tiled shower or a freestanding tub. There are some impressive bathtubs out there which can blow out humble budgets. Average Cost: $800-$5,000+.
Toilet: A standard toilet is relatively inexpensive, but high-end models with additional features (e.g., bidets, heated seats, or water-efficient designs) can cost significantly more. Average Cost: $150-$1,000+.
Sink and Faucet: Sinks and faucets come in a wide range of styles and finishes. Higher-end finishes like brushed gold or matte black will cost more than standard chrome. If you're on a tight budget then you can pick up some really affordable plastic shower heads and basic tap sets.Average Cost: $100-$1,500+ for sink and faucet.
Lighting: Lighting can range from simple fixtures to custom designs or high-end recessed lighting systems. Adding lighting in areas like around mirrors or showers can increase costs.Average Cost: $100-$2,000+.
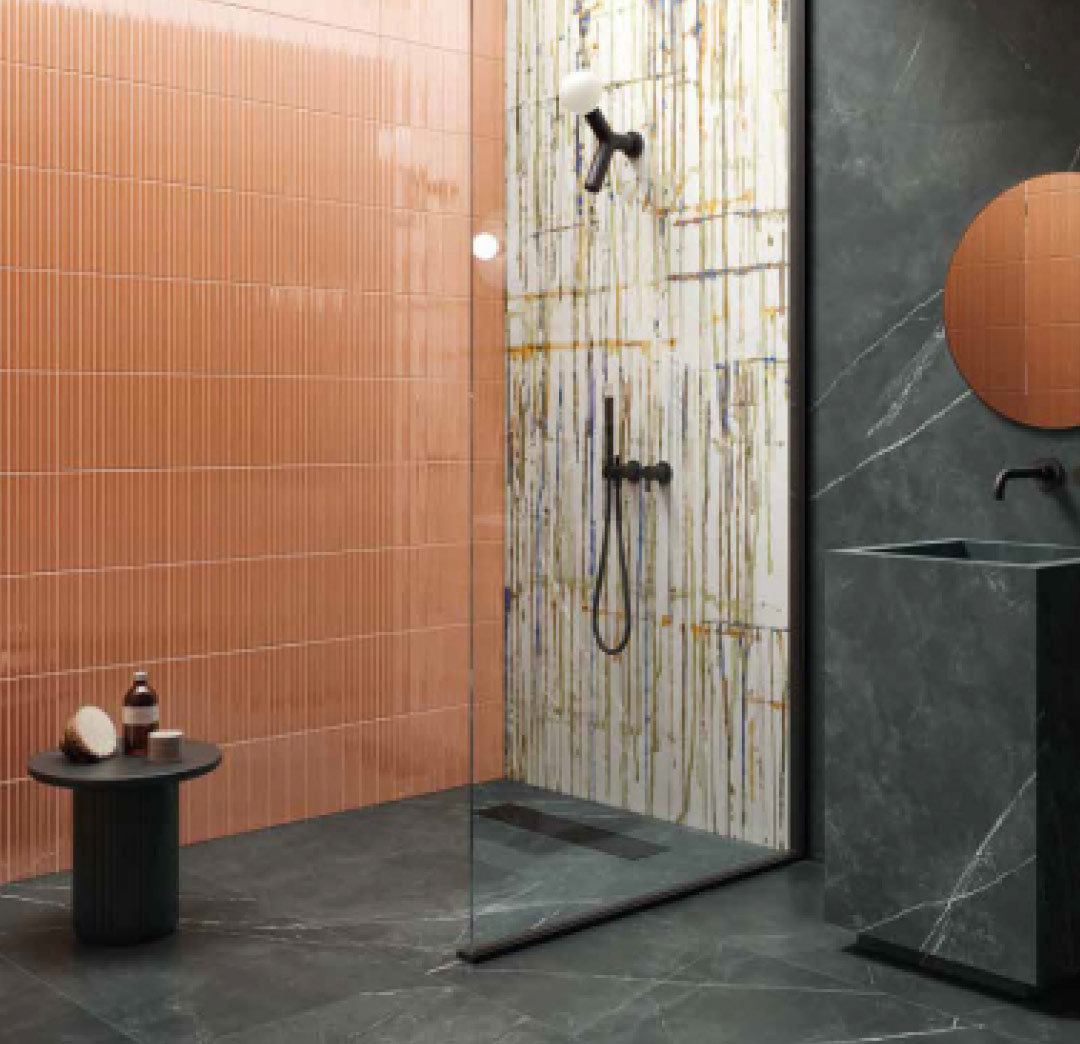
The metallic tile range and inspiration gallery direct from Italy.
SEE THE RANGEPlumbing Costs: Moving plumbing fixtures for sinks, showers or toilets adds significant cost, especially if it involves rerouting pipes or installing new drains. Simple fixture replacements are cheaper but still require a plumber. Average Cost: $500-$2,000+.
Electrical Costs: Adding or upgrading electrical outlets, lighting, exhaust fans, or heated floors requires the expertise of an electrician. The cost depends on the complexity of the wiring and whether new circuits are needed. It's important to note that electricians are legally required to do your electrical work. Average Cost: $500-$1,500+.
Labour is often one of the most significant expenses in a bathroom renovation. It includes the cost of hiring contractors, plumbers, electricians, tile setters, painters, and possibly designers.
Project Manager: You're probably going to be the project manager of a bathroom renovation in your own home. Otherwise, if the bathroom is part of larger building works, your builder could have it under control already. Average Cost: $50-$150+ per hour.
Tile Installation: Laying tiles, especially intricate designs like mosaics or large format tiles, requires skill and experience. The cost increases with the complexity of the pattern and the size of the area.Average Cost: $30-$120 per square metre.
Plumbing Work: As mentioned, moving or installing new plumbing adds to the cost. Basic fixture replacements are more affordable but still require a licensed plumber.Average Cost: $70-$200+ per hour.
Electrical Work: Costs depend on the amount of electrical work needed, especially if you're installing new outlets, lighting, or heated flooring. Average Cost: $75-$200+ per hour.
Painting: Hiring a professional painter can range depending on the size of the bathroom and whether you need special moisture-resistant paint.Average Cost: $300-$800.
Carpentry: We've heard horror stories of couples pulling up tiles to find rotten wood thanks to decades of water leaks. Sometimes a carpenter will be needed to repair, replace or setup foundations for your new bathroom.Average Cost: $75-$150 per hour.
Reconfiguring the Layout: Changing the layout of the bathroom by moving fixtures like the toilet, shower, or vanity involves significant costs. This requires rerouting plumbing, electrical wiring, and possibly demolishing walls.Average Cost: $2,000–$10,000+, depending on the extent of the changes.
Non-Layout Renovations: Keeping the existing layout and only updating fixtures and finishes is generally less expensive, as it avoids major structural changes.
Permits: Major renovations may require permits, especially if plumbing, electrical, or structural changes are involved. Permit fees vary depending on your location and the scope of the renovation.Average Cost: $100–$1,000+, depending on the extent of the changes.
Regulations: Local building codes may require specific waterproofing, ventilation, or electrical standards, which can add to the cost of the renovation if adjustments need to be made.
Waterproofing is crucial in bathroom renovations to prevent leaks, mould, and water damage. It’s especially important in areas like the shower, around the bathtub, and on the floor.
Waterproofing Costs: Professional waterproofing adds to the overall budget, but it’s an essential investment for long-term durability.Average Cost: $500–$1,500.
Proper ventilation is critical in bathrooms to avoid moisture buildup, mould, and mildew. You may need to upgrade or install a new exhaust fan or heating system, such as heated towel rails or radiant floor heating.
Exhaust Fans: Higher-quality or quieter models will cost more.Average Cost: $150–$500.
Heating Systems: Adding radiant floor heating or heated towel racks adds luxury but also increases the renovation cost.Average Cost: $500–$3,000+.
Professional Design Services: Hiring an interior designer or architect adds to the cost, but their expertise can help maximise space and improve the overall aesthetic. Some contractors may include design in their service.Average Cost: $1,500–$5,000+.
Custom Features: Adding custom cabinetry, built-in storage, niches in showers, or bespoke lighting features increases the overall cost.
Custom Tile Work: Intricate designs, mosaics, or custom patterns can also add to labour costs and material expenses.
Timeline of the Project: The longer the project takes, the more labour costs will accumulate. Delays in material availability, unexpected structural issues, or needing to wait for permits can also prolong the renovation.
Structural Repairs: Sometimes, renovations reveal hidden issues like water damage, mould, or faulty wiring that must be addressed before continuing with the remodel.Average Cost: $500–$5,000+, depending on the severity.
Custom Features: Adding custom cabinetry, built-in storage, niches in showers, or bespoke lighting features increases the overall cost.
Custom Tile Work: Intricate designs, mosaics, or custom patterns can also add to labour costs and material expenses.
Not all the above factors will apply to you, but generally speaking a bathroom renovations can vary widely in cost:
Low-End (Cosmetic Upgrades): $5,000–$10,000.
Mid-Range (Partial Remodel): $10,000–$25,000.
High-End (Full Remodel with Custom Features): $25,000–$50,000+.
By carefully planning and considering each of these factors, you can better estimate the cost of your bathroom renovation and prioritise where to allocate your budget.
Volare Tiles + Flooring are committed to supplying Australians with top quality, attractive, modern and cost effective bathroom tiles which is why you can access the range any time, anywhere:
The team of flooring experts will guide you through the bathroom tile ranges, styles, colours and even make some interior design suggestions when it comes to bathroom design.
Book a FREE online design consultation and see all the Bathroom Tile ranges and options.
We’ve launched a Free Online Design Consultation service
We're bringing the Volaré showroom to you! Speak with a design consultant via video chat to discuss your project, view flooring and tile ranges, styles, colours and organise samples to be delivered straight to your house.
Updated Showroom Hours
All our showrooms are still open and operational.
Geelong - M-F: 8.30am - 5.00pm | Sat: 9.00 am - 3.00pm | Online Consultation
Canberra - M-F: 8.00am - 5.00pm | Sat: 8.30 am - 1.00pm | Online Consultation
Richmond - M-F: 8.30am - 5.00pm | Sat: 10.00 am - 2.00pm | By Appointment Only (Browsers welcome) & Online Consultation
Volaré have implemented socially responsible measures to minimise the COVID-19 risk to all our staff and customers. With these safety measures in place we're proud to continue business and abide by the ongoing Government regulations.
If you can't visit a showroom, or aren't sure if you should, please find your local stores details in our outlets page and give us a call - we can take care of all your needs remotely.
Please keep yourself & your family safe during this unprecedented time.
Thank you,